작성자 : 박승재
기본적인 흐름은 노트북의 카메라 웹캠을 통한 Training_data를 모으고,
LBPFacerecognizer를 이용한 model을 training_data로 학습한 후에
노트북 웹캠으로 사람의 얼굴이 인지 되었을 때 회원인지 비회원인지를 판별해내는 데 까지
구현을 해보았습니다.
참조 github는 https://github.com/subhamroy021/Facial-Recognition.git
informramiz/opencv-face-recognition-python
Face Recognition using OpenCV and Python. . Contribute to informramiz/opencv-face-recognition-python development by creating an account on GitHub.
github.com
1. 웹캠을 통한 Training_data 모으기
code
import cv2
import numpy as np
#얼굴 인식용 xml파일
face_classifier = cv2.CascadeClassifier('haarcascade_frontalface_default.xml')
#전체 사진에서 얼굴 부위만 잘라 리턴하는 함수
def face_extractor(img):
#흑백 처리
gray = cv2.cvtColor(img,cv2.COLOR_BGR2GRAY)
#얼굴 찾기 face_classifier의 detect를 사용한다.
faces = face_classifier.detectMultiScale(gray,1.3,5)
#찾는 얼굴이 없으면 None으로 리턴한다.
if faces is():
return None
#사진에서 얼굴을 찾았다면 x,y,w,h 값을 얻어 처리 x,y는 왼쪽 아래 점.
for(x,y,w,h) in faces:
#얼굴사이즈 만큼 crop하며 잘라넣는다
#만약 얼굴이 2개 이상 감지 되었을 시에 가장 마지막 얼굴만 남긴다.
cropped_face = img[y:y+h, x:x+w]
#crop 한 얼굴사진을 리턴
return cropped_face
#카메라 실행
cap = cv2.VideoCapture(0)
#저장할 이미지 카운트 변수
slist = [1,2,3]
for i in slist:
count = 0
while True:
#카메라로 부터 사진 1장을 찍어 얻기
ret, frame = cap.read()
#얼굴 감지 함수를 사용해서 크롭한 얼굴사진 가져오기
if face_extractor(frame) is not None:
count+=1
#얼굴 이미지 크기를 200*200사이즈로 리사이즈
face = cv2.resize(face_extractor(frame),(200,200))
#조정한 이미지를 흑백사진으로 변환
face = cv2.cvtColor(face, cv2.COLOR_BGR2GRAY)
#faces폴더에 user#로 .jpg로 저장
file_name_path = 'training_data/s%d/user'%i+str(count)+'.jpg'
cv2.imwrite(file_name_path,face)
#화면에 얼굴과 현재 저장개수 표시해준다
cv2.putText(face,str(count),(50,50),cv2.FONT_HERSHEY_COMPLEX,1,(0,255,0),2)
cv2.imshow('Face Cropper',face)
else:
print("Face not Found")
pass
if cv2.waitKey(1)==27 or count==100:
break
cap.release()
cv2.destroyAllWindows()
print('Colleting Samples Complete!!!')
-----------------------------------------------------------------------------------------------------------
training_data 폴더에 각각 s1,s2,s3 하위폴더를 만들고 각각 서장훈,안정환,정형돈 사진에서 얼굴을
face_cascade = cv2.CascadeClassifier('haarcascade_frontalface_default.xml')를 통해 detect합니다.
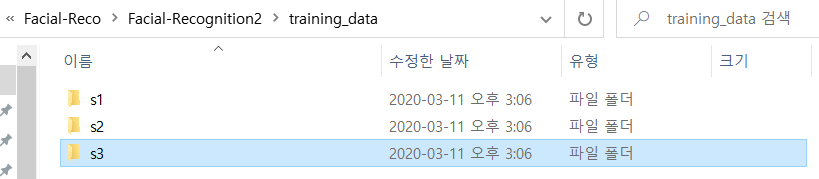
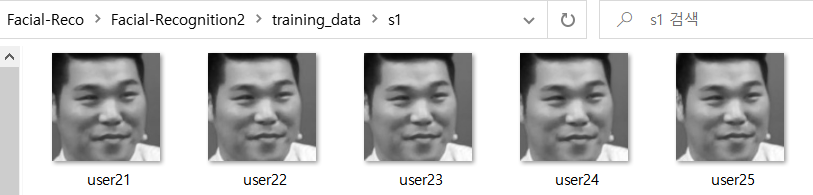
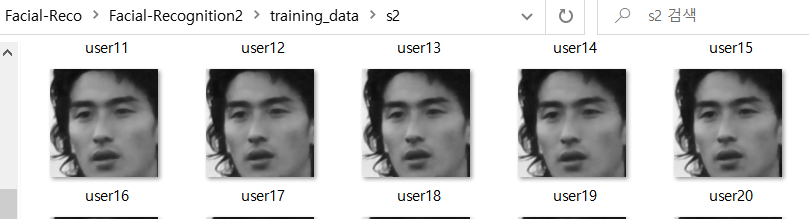
s1,s2,s3에 100장씩의 training_data사진을 opencv를 이용한 cv2.VideoCapture(0)의 웹캠을 통해 모은 상태입니다.
2. Training_data를 이용하여 model 훈련시키기
code
def prepare_training_data(data_folder_path):
#------STEP-1--------
#get the directories (one directory for each subject) in data folder
dirs = os.listdir(data_folder_path)
#list to hold all subject faces
faces = []
#list to hold labels for all subjects
labels = []
#let's go through each directory and read images within it
for dir_name in dirs:
#our subject directories start with letter 's' so
#ignore any non-relevant directories if any
if not dir_name.startswith("s"):
continue;
#------STEP-2--------
#extract label number of subject from dir_name
#format of dir name = slabel
#, so removing letter 's' from dir_name will give us label
label = int(dir_name.replace("s", ""))
#build path of directory containin images for current subject subject
#sample subject_dir_path = "training-data/s1"
subject_dir_path = data_folder_path + "/" + dir_name
#get the images names that are inside the given subject directory
subject_images_names = os.listdir(subject_dir_path)
#------STEP-3--------
#go through each image name, read image,
#detect face and add face to list of faces
for image_name in subject_images_names:
#ignore system files like .DS_Store
if image_name.startswith("."):
continue;
#build image path
#sample image path = training-data/s1/1.pgm
image_path = subject_dir_path + "/" + image_name
#read image
image = cv2.imread(image_path)
#display an image window to show the image
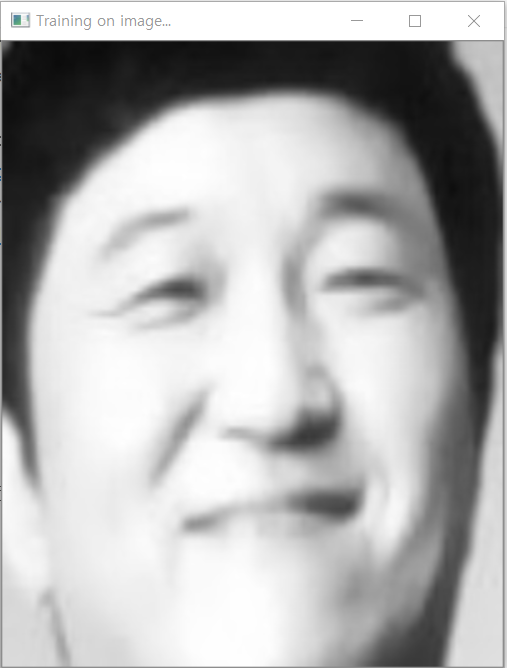
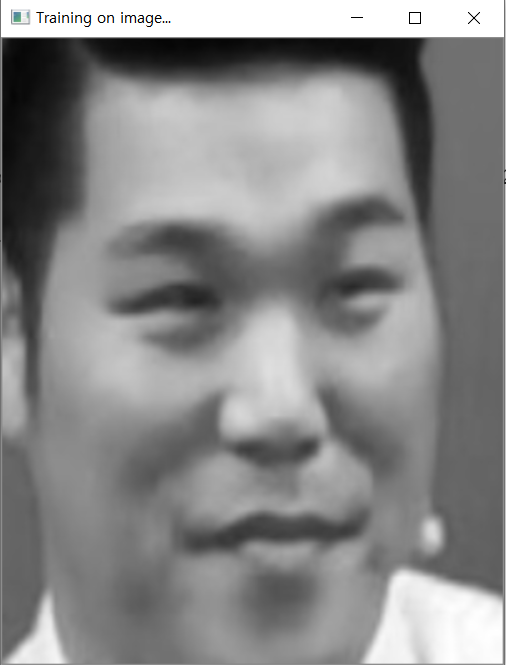
cv2.imshow("Training on image...", cv2.resize(image, (400, 500)))
cv2.waitKey(100)
#detect face
face, rect = detect_face(image)
#------STEP-4--------
#for the purpose of this tutorial
#we will ignore faces that are not detected
if face is not None:
#add face to list of faces
faces.append(face)
#add label for this face
labels.append(label)
#print(faces,labels)
cv2.destroyAllWindows()
cv2.waitKey(1)
cv2.destroyAllWindows()
return faces, labels
#create our LBPH face recognizer
model = cv2.face.LBPHFaceRecognizer_create()
LBPHFaceRecognizer란?
LBP 알고리즘은 Local-Binary-Pattern 의 약자로 주변의 값을 2진수로 표현한 뒤, 값을 계산합니다.
즉, LBP 연산자는 말 그대로 지역적인(local) 이진(binary) 패턴(pattern)을 계산
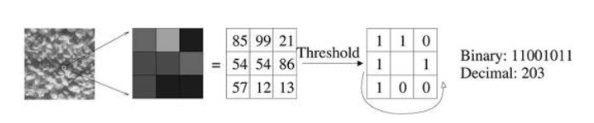
3x3셀 내에서 중심에 위치하는 픽셀과 이웃하는 8개의 픽셀끼리 서로 크기를 비교한다. 그림2의 경우 중심 픽셀의 값이 54이므로 이웃하는 픽셀값이 이것보다 크거나 같으면 1로, 이것보다 작으면 0으로 threshold해준다. 순서대로 나열하면 11001011과 같은 이진값을 얻게 된다. 이렇게 얻은 이진수 값을 십진수 값으로 계산해보면 203이다. 가능한 값으로는

부터

까지 총 256개의 경우의 수를 가진다. 모든 픽셀에 대해서 이것을 계산한 후 히스토그램을 만들어준다. 단순히 픽셀값의 히스토그램이 아니라 LBP값들의 히스토그램을 만드는 것이다. 그러면 총 256개의 bin이 채워질 것이다. 하나의 영상의 질감을 256개의 숫자로 표현하는 것이다.
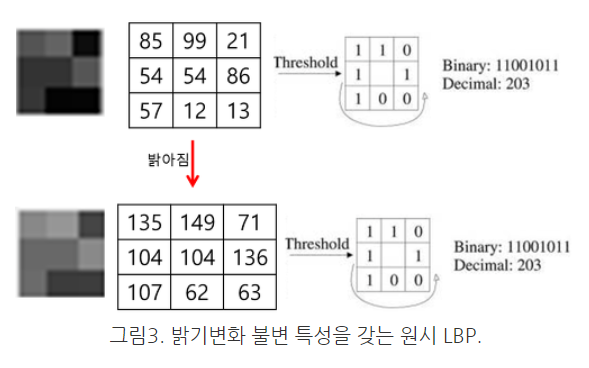
이러한 원시 LBP는 영상의 밝기가 변해도 robust한 특징을 갖는다. 그림3을 보면 알 수 있듯이 단순한 밝기의 변화는 LBP연산에 영향을 미치지 않는다.
위의 함수를 통한 model 훈련을 하게 되면 3명의 기존 멤버에 대한 얼굴인식 훈련이 이루어집니다.

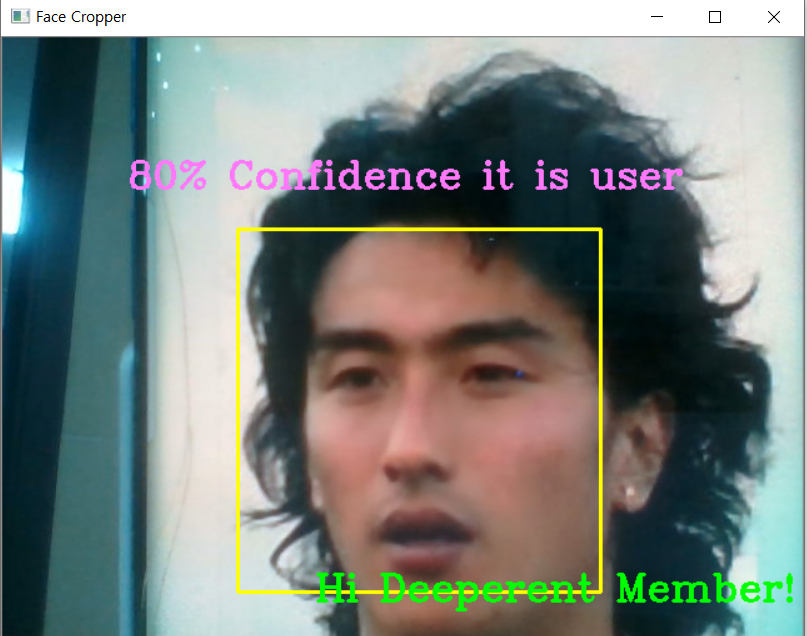
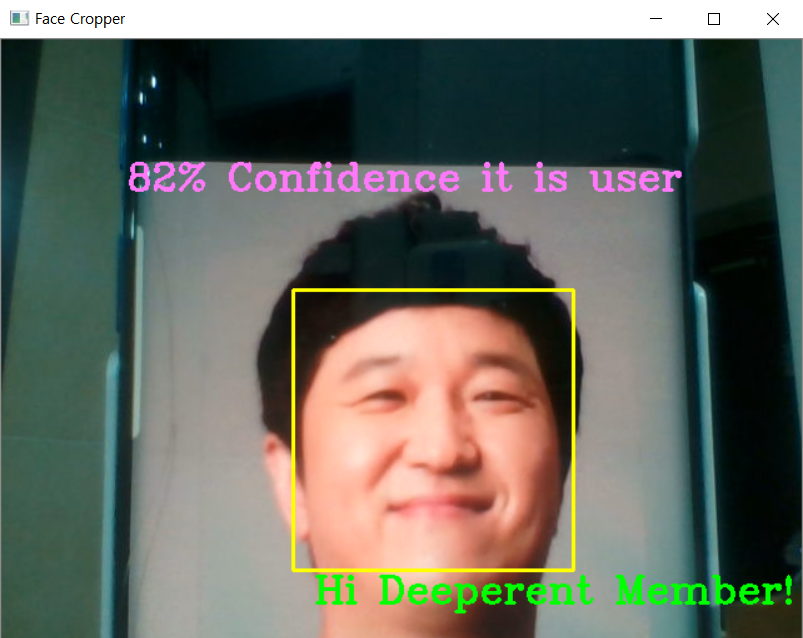
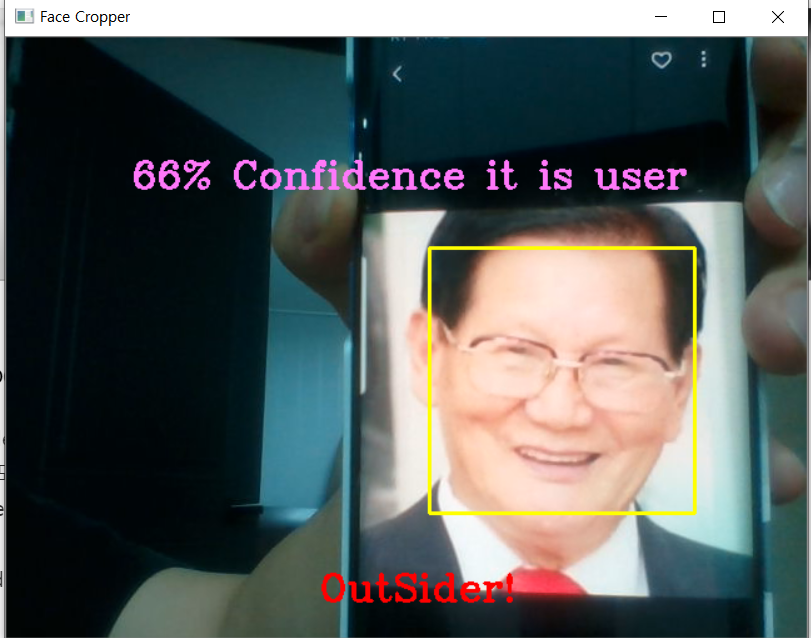
3. model의 훈련을 마친 후에는 웹캠을 통한 실시간 Test
cv2.VideoCapture(0)을 이용하여 영상을 받아 한장씩 사진을 받아서
1)신뢰도가 75점 정도 이상이면
'Hi Deeperent Member!'라는 Text가 나오고 회원이라고 인지합니다.

2) 반면 신뢰도가 75점 이하라면
'OutSider!'라는 Text와 함께 비회원임을 인지합니다.
code
#카메라열기
cap = cv2.VideoCapture(0)
while True:
#카메라에서 사진 한장 읽기
ret, frame = cap.read()
#얼굴 검출해내기
image,unknownface = face_detector(frame)
try:
#검출된 사진을 흑백으로 변환
unknownface = cv2.cvtColor(unknownface, cv2.COLOR_BGR2GRAY)
#predict_img = predict(unknownface)
#print("Prediction complete")
result = model.predict(unknownface)
if result[1] < 500:
confidence = int(100*(1-(result[1])/300))
display_string = str(confidence)+'% Confidence it is user'
cv2.putText(image,display_string,(100,120), cv2.FONT_HERSHEY_COMPLEX,1,(250,120,255),2)
if confidence > 75:
cv2.putText(image, "Hi Deeperent Member!", (250, 450), cv2.FONT_HERSHEY_COMPLEX, 1, (0, 255, 0), 2)
cv2.imshow('Face Cropper', image)
else:
cv2.putText(image, "OutSider!", (250, 450), cv2.FONT_HERSHEY_COMPLEX, 1, (0, 0, 255), 2)
cv2.imshow('Face Cropper', image)
except:
cv2.putText(image, "Face Not Found", (400,500), cv2.FONT_HERSHEY_COMPLEX, 1, (255,0,0),2)
print("Face Not Found!")
#cv2.imshow('Fail Face Cropper',image)
pass
if cv2.waitKey(1) == 27:
break
cap.release()
cv2.destroyAllWindows()
4. 추후 수정할 내용
우선 각각 label된 인물에 대해 학습이 가능하고 database 내의 인물임을 식별이 가능하다고 생각합니다.
다만 좀더 세부적으로 이 인물의 이름에 대한 labeling 작업이 필요할 거 같습니다.
또한 다음 계획으로는 출석관리시스템이기에 출석한 회원의 이름까지 인지가 되어야 하고 출석하지 않은
회원 또한 파악해야 할 것 같습니다.
'3.5기(200104~)' 카테고리의 다른 글
| Stereo R-CNN, 3D Box Estimation (가제) (0) | 2020.04.19 |
|---|---|
| 드론 강화학습 개요 (0) | 2020.03.07 |
| 3.5기 4팀 강화학습 스터디 (0) | 2020.02.23 |
| 3.5기 1팀 성광현 yolo v3, faster r-cnn (0) | 2020.02.15 |
| 3.5기 3팀 YOLO, R-CNN (0) | 2020.02.13 |